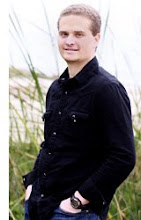
I will be launching a new site soon dedicated to helping the non professional photographer take better photos. The goal of the site is to give simple non technical advice. Here is my first article:
12 Steps to Better Photos:
1. Forget about the camera. This is mostly for the guys- we tend to obsess over the technology- any camera (including your cell phone) today is capable of taking a great picture. Forget about the gear and use your eyes and feet to find the best photo.
2. Slow down. 10 great photos are much better than 1000 bad ones. Think about the photo you are taking, what story do you want to tell. Try closing one eye to see the world in 2D.
3. Move. Most people take photos standing straight and never bother to change their perspective. Get low, get higher, tilt the camera, jump, do whatever it takes to find a fresh angle on the shot. I suggest shooting an image and then changing the perspective radically and shooting again.
4. Watch your background. We tend to focus on the subject of our photo and sometimes forget about what is behind it. Generally the simpler the background- the better. Try getting a high angle to use the grass as a simple backdrop or go really low and use the blue sky. Look for solid color walls. Watch out for distracting backgrounds that take away from your image.
5. Simplify. Don't try to fit everything in the photo, usually this leads to a chaotic image without any focus. Find one thing you want to shoot and eliminate the rest. Powerful images are usually simple ones.
6. Smile. We want our subjects to be relaxed and happy. The easiest way to make your subject relaxed and happy is to be relaxed and happy. Smiles are contagious.
7. Zoom in for people. People look better when the lens is longer so zoom in. A long lens compresses lines in the face making everyone a little younger. When you zoom in the depth of field (area of sharp focus) narrows making your subject pop off the background.
8. Zoom Out move in. Wide angle is generally not flattering for people, if you do use it try to keep them out of the edges where the lens distortion is most noticeable. A wide angle lens can give a dramatic point of view especially when you move in close to the subject. Experiment with the perspectives of your lens and learn how the perspective changes the way a subject appears.
9. Try Manual. The automatic modes on your camera are generally pretty good most of the time, especially in bright light. However by using the cameras manual function you can sometimes get more creative controlled results. You can also try using the auto exposure adjustment dial. One quick example: You are inside at a party with low lighting. Try going to iso800 exposure time 1/30th and f2.8 or f4.o. Make sure the flash is on. The camera in automatic will likely pick a fast exposure time and the ambient light in the room would be lost. You can use slower exposure times to capture some of the atmosphere and rely on the flash to correctly expose your subject. Try even slower times for more of the same effect. If you have a newer DSLR push the iso to 1600 to let in even more ambient light.
10. Lines & Composition. Look for lines that lead into your subject, the eye will follow lines in an image, try to control the lines and have them lead into your image.
11. Off Center. You do not need to always center your subject, in fact most of the time the subject should not be dead center. Try placing subjects in the thirds on either side. (artists call this a rule of thirds) If your subject is looking or moving somewhere give them some room in that direction by placing 2/3rds of the image in front. Also when framing a close up of the face it is the chin not the forehead that gives the face shape, so feel free to crop in close leaving the top of the head out sometimes.
12. Light. Good light makes good photos. All the expensive gear in the world is meaningless without good light. Try shooting landscapes in the early morning right as the sun comes up or the late afternoon as it sets. People look better at these times as well. If you do have to shoot in the middle of the day use flash to fill in shadows and look for shade or spots where the light is redirected from the sides. Pay attention to the light.
Josh
www.jklineproductions.com
 I photographed Christine & Staton at Griffith Park. They were a lot of fun and we got some great images.


